Thursday, May 31, 2012

Slowly but Surely

Not too much (visible) progress today.  Late start for daughter's dr's appt, and all is well there.

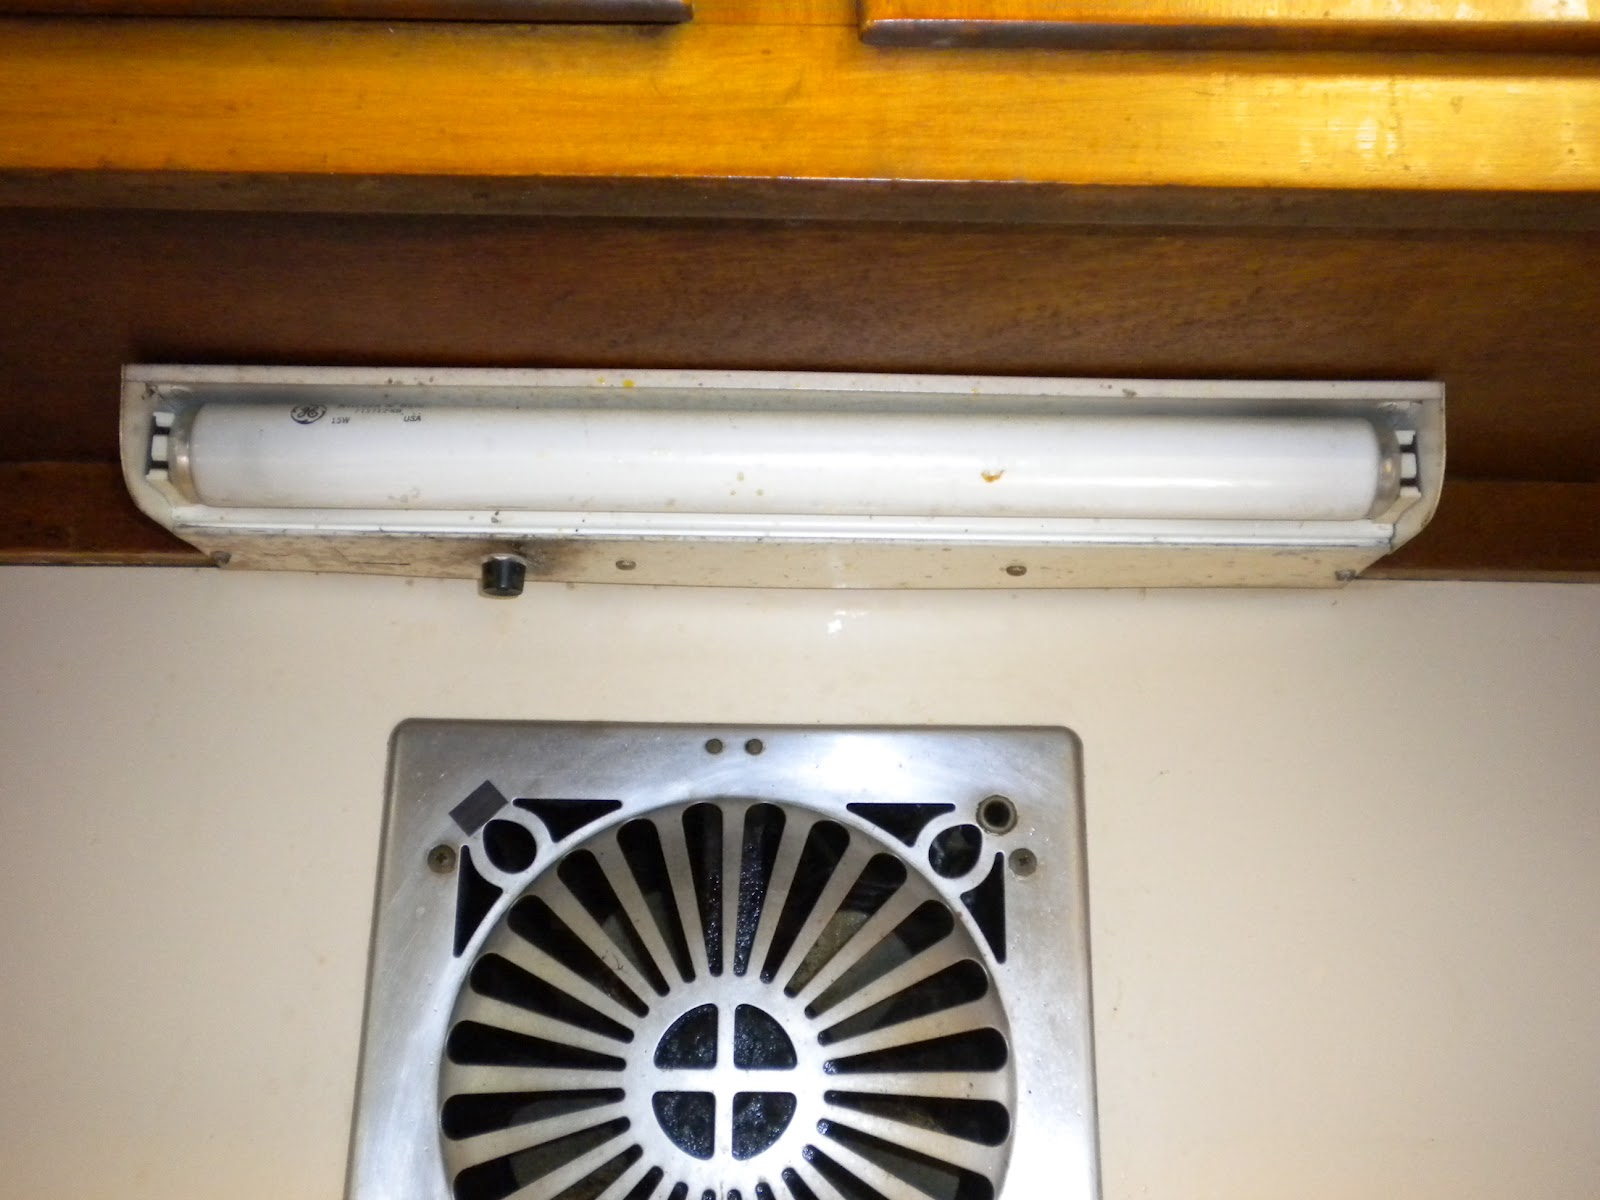
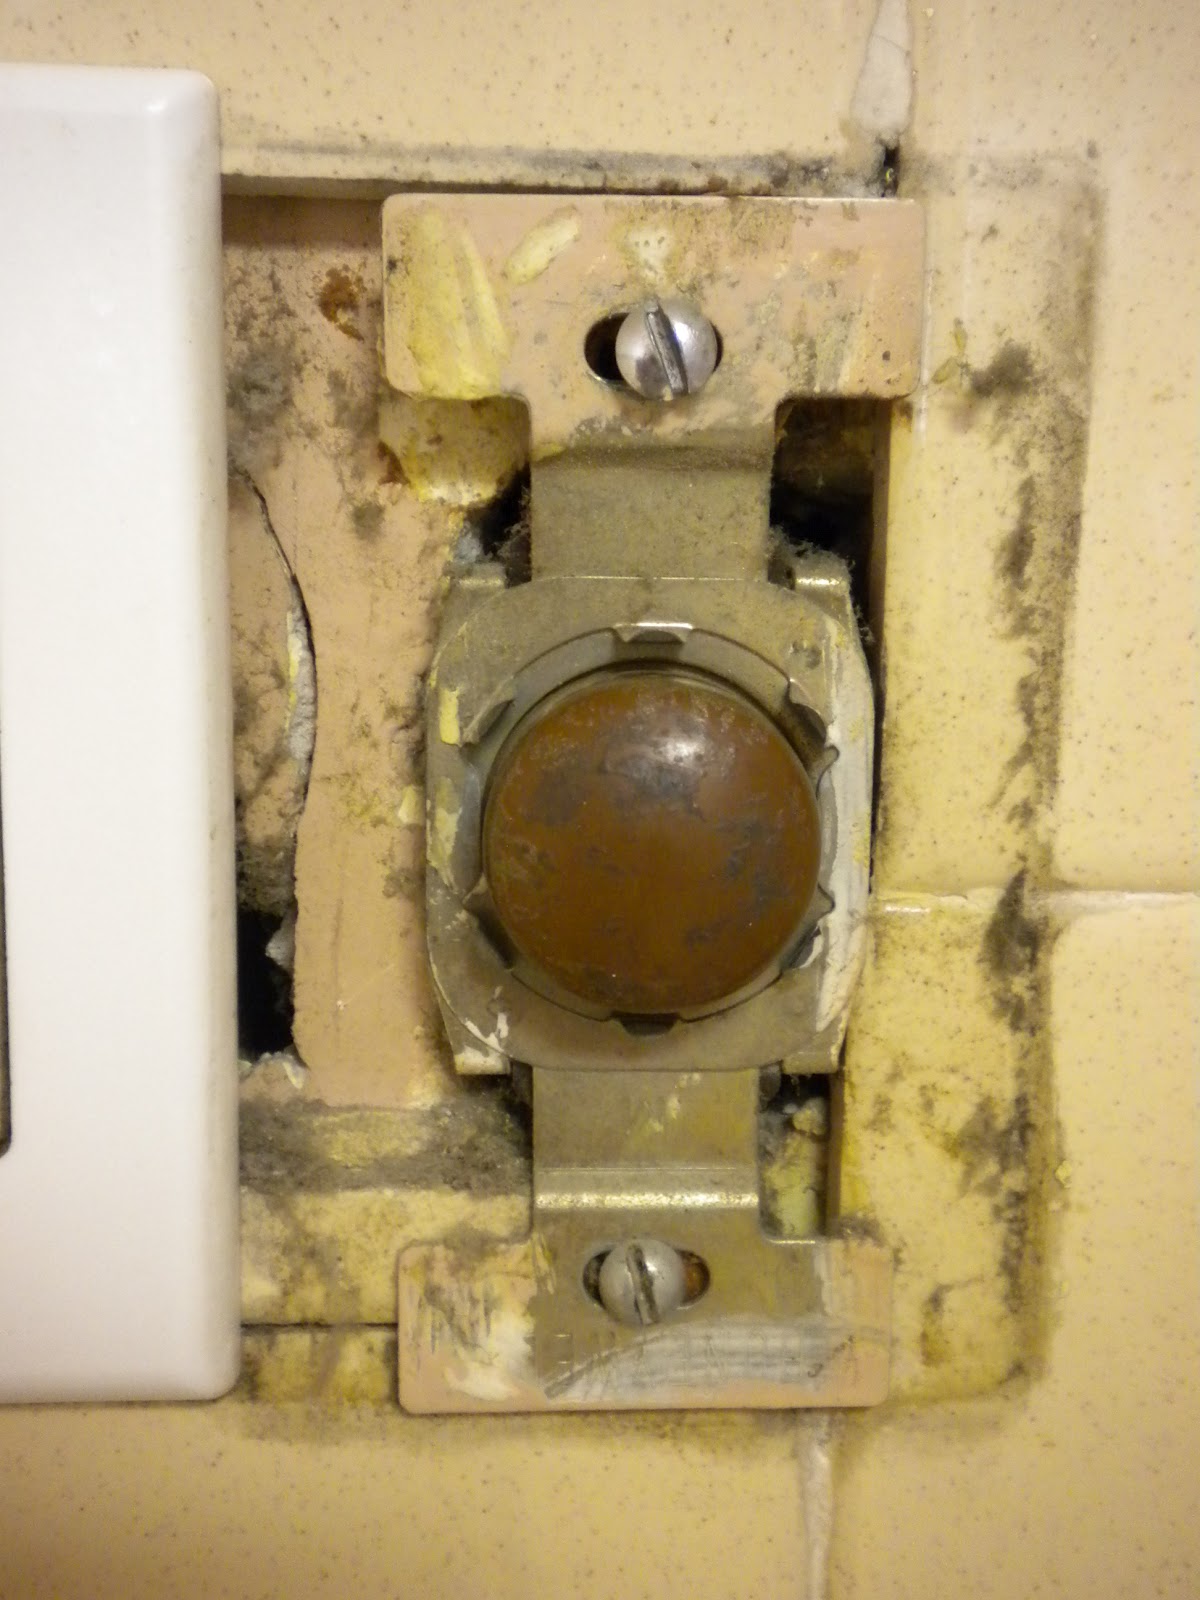
I started doing some electrical, to uncouple the kitchen from the laundry, etc.  Surprise!  The supply line from the panel runs directly to an outlet in the kitchen, and from there to a box in the crawl space (seriously, only 2 feet below the outlet box - they should have run the line to the box in the crawl space FIRST, and THEN up to the outlet).  In the box, the supply is split to other items in the kitchen, outlets in the great room, and the laundry.  The circuit continues through the laundry to power some outside lights.  Really.  It's overloaded.

So, since I can't pull wire alone, I just ended up removing the first outlet in the kitchen, splicing the wires together so that the great room/laundry will still have power.  I was able to isolate and remove the lines for the kitchen exhaust fan, though, so there was some progress made.  A new wire needs to be pulled from the panel directly to the laundry to solve the problem, and this will be done eventually.  Luckily, we met a really nice guy when we lived at our old place who became a good friend and has agreed to help us out when we need it. He's going to be our "safety net" of sorts.  Definitely will need his help in pulling new wires over from the panel.

Had to run to buy a few small electic items (blanking plate and knock-out plug) - and also got a really nice pry bar to start working on ripping out the walls.

I was able to remove the soffit and wall cabinets on the exterior wall.  Need to address the gas supply line and remove the oven/cooktop tomorrow.  The hot supply to the dishwasher is frozen open, so I sprayed some WD-40 on it and will try again tomorrow.  Wish I could find my PB Blast.......

Unfortunately found out that the backsplash was over-engineered.  There was some 1/4 inch plywood GLUED to the plasterboard.  And then there was some veneer GLUED to the plywood (with troweled on mastic in both layers).  Honestly.  Wouldn't it have been easier to NAIL the plywood to the wall and then use adhesive to secure the veneer?  I don't get it.  They must really have liked the backsplash, becuase the only way to get that out is going to destroy the walls.  Luckily, I planned on removing the walls to install insulation.  Otherwise, this would have been an unsettling shock.

The wall cabinets were secured to the wall with a grand total of TWO screws on top, and TWO on the bottom.  The backsplash was more secured to the wall than the cabinets.  As was the soffit.  The orginal color of the cabinets was a nice birch color.

There was at least some progress today.  I was able to rip out some of the old electircal, and remove some more cabinets.  Found out about the dishwasher valve, and also about the routing of the "tangled" electric circuit.  I'm inspired to start an electrical code violation gallery.

Tomorrow I'm going to try to get the dishwasher out, and probably start ripping out walls.  Also need to go on a Home Depot run to pick up some electrical and plumbing supplies.
Mixer Box Trick.  Here's how I used the mixer box to support the top cabinets while removing them.  This cabinet had one screw on the top, and one screw on the bottom.   It was secured to the cabinet to it's right, which has already been removed.  The original color of the cabinets can be seen.

Exterior Wall Cabinets Removed.  You can see where I started to take off the backsplash.  The top layer of the rock lathe is coming off with it.  Good thing I've already planned on putting up all new drywall.


Wednesday, May 30, 2012

First Day of Demolition

Finally!

Got to start ripping some stuff out.  It's been nuts here.  Project was delayed for permits, and then it was my daughter's birthday, so in retrospect, it's probably a good thing the permits hung up getting started, so the kitchen was intact for her birthday party.

Only got to work about 3 hours in the kitchen today, since aforementioned daughter was sent home with a rash from daycare today.  Dr's appt tomorrow morning, but I'm sure she is fine, nonetheless.

Also got to take some pictures.

Original view of the interior wall. The fridge is shown on the left.
Interior wall with the cabinets removed.  There were only 5 screws
holding these cabinets onto the wall - 3 on top, and 2 on the bottom.
I was able to use my KitenAid stand mixer box to support the cabinets
while I was removing them.  I had to break them down completely and
carry them out in pieces to the dumpster.

The soffit above the cabinets was made of thin hardboard and was
very easy to remove.  You couldn't tell it was only hardboard by looking
at it.  It looked pretty good.


Screw and finish washer used to hold cabinets onto wall. 
That's my left thumb, to provide perspective.  The screws were
anchored into the 2x4's of the wall.


Original sink wall.


Sink wall with doors removed.


The sink.  It's so small!  New sink will be a double basin with
a nice high pull-out faucet and built-in soap dispenser.  I can't wait.

Under the sink.  Evidence of some
major leaks in the past.  The drain pipe was
new just before we bought the house.


Original exterior corner.  The wall oven is too narrow.


Exterior corner with doors removed.


Exhaust fan and fluorescent light above cooktop.  The louvres
on the fan don't close anymore because of all the grease.  It's getting
ripped out.


The Westinghouse tap-lite switch that controls the
exhaust fan is NOT in a box.  For those not familiar
with tap-lites, they are push-connectors only and not
grounded.  They are intermittent contact switches.
They don't make them anymore.  They are actually
pretty cool, except for the safety issues.  I never saw
them anywhere else except for in this house.  No other
houses we looked at in the area had them.
Tomorrow I plan on getting more demolition done.  I will probably cut the electric to the kitchen, which is currently on two 20A circuits.  One circuit is dedicated to the kitchen, so that will be easy, just turn off the breaker.  The other circuit is shared with the kitchen, some outlets in the great room, some outlets in the laundry, an outside light, and the doorbell.  So much for code dictating the kitchen have dedicated circuits (and also the laundry).  And yet all the electric was signed off on just before we bought the house. 

I don't understand why our township requires permits if they do not enforce code.  I think, unfortunately, it's a wink-wink-nod-nod thing among contractors and inspectors, and the inspectors only look over the work if it's not a "professional" doing the work.  That bugs me, in a way, because I would never install a switch without a box, and I sure as heck wouldn't put a washer, dryer (gas), fridge, outside light, dishwasher, and three other outlets on the same circuit!  Come on, now!

Besides sorting out some electical issues, I might remove the dishwasher or the light/fan over the cooktop.  Possibly rip out the top cabinets on the exterior wall.  We'll see how things go.

Friday, May 11, 2012

A Down Home Depot Day

Not much doing today.  Hung out at Home Depot for about two hours, looking at tile.  Picked up some paint samples.  Brought back a few pieces of floor tiles for my husband to look at tomorrow.  Did get three 20 A circuit breakers and got to talk to an electrician who gave me some good info on running cable and installing boxes in exterior walls. 

I never had to deal with running cable in an exterior wall like this before. The exterior walls in the kitchen are cinderblock (load bearing) with brick exterior.  There are 1x3's on top the cinderblock, and there is currently plaster on top of those.  Replacing plaster with half-inch drywall.  Anyway, he told me that to fit a full size box into the wall, just chisel out the cinderblock.  This completely makes sense, becuase there are two GFCI's on the exterior wall behind the sink currently, and I couldn't figure out how they got the boxes flush with the hardboard backsplash.

Which brings me to the tile.  I want to do a nice 1x1 mosaic tile backsplash.  I'm thinking a mix of muted tones with some blue highlights.  There was a piece of flooring at Home Depot with blue highlights in it, and I instantly thought to incorporate some blue in the backsplash tile.  The cabinets are white (Lidingo from IKEA), with the solid oak countertops, stainless steel sink and bisque appliances.  Yellow paint on the walls, and a faux-stone floor.  I think it will be very nice.  I hope.

Just need to calculate how many 12x12 pieces of tile are needed for the backsplash, and I'll pick them up tomorrow.  I can't believe how expensive they are, but I think it will make a nice feature in the kitchen.  Plus, it will be easier to cut the tiles apart to fit them than having to nibble down or scribe and snap ceramic.  I figure it's going to be about $5 per square foot.  There is 10 linear feet of counter top across the back, 5 on one side, and 7 on the other - and I'd like to run the tile up the wall behind the stove.  So that's 10 + 5 + 7, 25 square feet minimum 25 x 5 - that's 125.  Plus a bit to run up behind the stove - 2.5 feet by 1.5 feet - so add another 4 square feet - and since there's 1.5 feet above the counter, then add a half a foot all around - let's say 13 more square feet.  Let's see, that makes 25 +13 + 4, or 25 + 17, for a total of 42 square feet - which is 42 x 5, or 210.  I guess that's not too bad.  Of course, I'll have to check my plans to be certain of the square footage.

More tomorrow.  If anyone has insights on working with 1x1 mosaic glass tile, please let me know.  Also if anyone has ever had to make a choice between ceramic, porcelain, or vinyl floor tiling, what did you go with and why?  The ceramic and porcelain are way less than the vinyl......

Thursday, May 10, 2012

State of the kitchen when we bought the house

We bought a split-level house that was built in the 50's.  It's a nice place, but definitely in need of updating.  The kitchen is ORIGINAL, with built-in wood cabinetry.  They are dark-oak stained plywood, and were custom-designed for the space.  They are not modular like today's cabinets. 

The only updating the previous owners did consisted of changing the appliances.  They also removed all of the fancy brass cabinet-door pulls.  We know this because we found one lying in a bottom drawer.  We really wouldn't care so much that the sellers replaced the flush-mount door-pulls with $0.80 cheapies from Home Depot, except that this caused the dishwasher, which was installed in a corner, not to open fully. 

Don't get me started on the condition of the appliances when we bought the place.  Each one had its own special problem, and the refrigerator didn't make it two weeks.  Apparently, it got cool, but never went below 55 degrees Farenheit on a good day.  We caught on when two quarts of milk soured in about 2 days, back to back.  Lesson learned?  Make sure your home inspector uses a thermometer to check the fridge temp. 

But there was an upside here, as we got a "brand new" Kenmore side-by-side with through the door ice and water.  It came from a Sears Outlet store, and we got a major deal on it because it has a few minor dings.  None are very noticeable, and we have kid-art all over the doors anyway.

The stainless-steel wall oven and ancient stainless cook top were passable.  The wall oven is not deep enough to hold a standard size cookie pan, and forget about putting two cookie sheets next to each other on the same oven shelf.  The thermocouple for the broiler element was lying in the cabinet above the oven, and the broiler has never worked since we've been here.  Why?  Because there's no thermocouple installed on it!  Lesson learned here?  Make sure your home inspector trys BOTH the broiler AND the oven heating elements, especially when you FIND A THERMOCOUPLE lying in the cabinet above the oven DURING the home insepction.

Surprisingly, the dishwasher is holding its own.  I actually like the dishwasher very much, especially now that we budged it over an inch and can open the door all the way.  It's a Kenmore, guessing about 10 years old, but it runs very well, and the dishes actually get clean.  It's a fighter, the dishwasher.  It has to pump out it's drain water through a teeny-tiny copper tube, much too small for it.  If the pump hasn't burnt out yet, it never will.  The dishwasher will be very happy in its new home next to the sink, and will enjoy its new, larger-diameter drain pipe very much.  It's earned its spot in the new kitchen.  The wall oven and the cook top have dates with eBay, and I'll be sure to disclose the broken broiler element, and also that the electric ignition for the left-front burner doesn't work on the cook top.  Becaue that's what sellers usually do, at least the ones who like clear consiences.  Let me rephrase that, at least the sellers who have consciences and like to keep them clear.

Why I am writing this blog

I'm getting a new kitchen and I can't stop talking about it.  Apparently, I'm talking about it TOO much, to everyone I know.  I guess I realized that I needed another outlet to obsess about the kitchen when my father suggested that I write a blog about it.  Boy, oh boy, I must really be talking about it too much if even he is tired of my ramblings, because he usually loves to talk about all things mechanical and home-improvement.  So here I am, blogging on the internet, to save the sanity of all those around me.

I've never written a blog before about any past projects.  Then again, blogs weren't too popular at the time.  So I hope you'll bear with me at times while I try to figure things out.  Hopefully, someone out there might benefit from the information posted here, and maybe someone will read one of my posts and think, "She wants to do WHAT?  You can't do THAT!", and will reply to suggest a better approach to something.